QuickBooks Online — Data ImportUpdated 2 years ago
Below are the guides for BOTH Customer and Inventory Data to ensure successful transfer of information
Pool Office Manager can connect and sync directly with QuickBooks Online!
Simply email [email protected] with your company name and request to activate your QuickBooks Online.
Once activated, we will provide instructions for you to connect your QBO to Pool Office Manager and automatically sync customers and items. A fee of $25/month is added to the total subscription cost for a QuickBooks Online connection.
To manually import your data, you can do so following the instructions below (the $25/month fee is still applied)
Customer Information
-
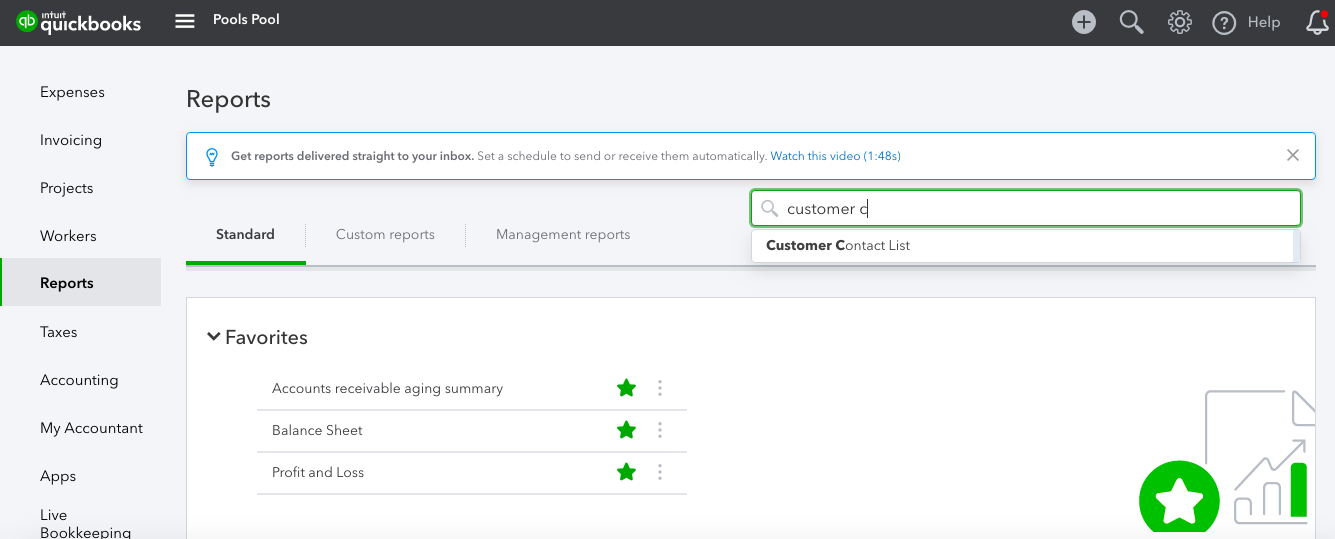
Open QuickBooks Online and open Reports
-
Type in the search Customer Contact List and select that report
-
On the right side of the page, select the gear icon (highlighted in red below)

-
Please select all name, address, and contact information. When in doubt include it!
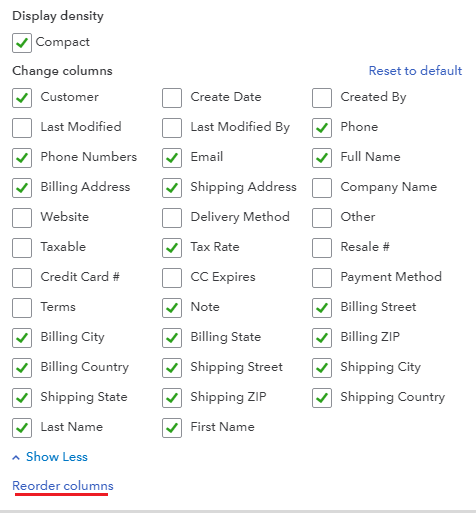
Fields to include (if possible): Customer, Last Name/Company Name, First Name, Phone Number, Alt. Phone Number, Email, CC Email,
Shipping Street, Shipping City, Shipping State, Shipping ZIP, Note,
Billing Last Name/Company, Billing First Name, Billing Email, Billing CC Email, Billing Street, Billing City, Billing State, Billing ZIP,
Sales Tax Item, Is Customer Commercial Account?
5. After selecting all required fields to import, select Reorder columns in the bottom corner of the box (underlined in red in picture above)
6. Last step, select the page and arrow icon (highlighted in red below) and select Export to Excel
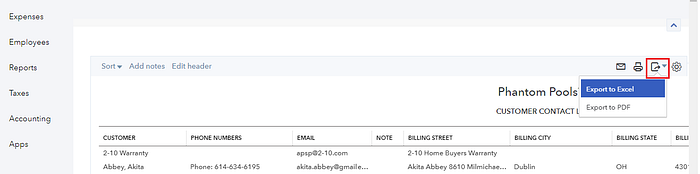
7. An excel file will begin downloading, you can send this file
— — — — — — — — — — — — — — — — — — — — — — — — — — — — — —
Inventory
-
Open QuickBooks Online and open Reports
-
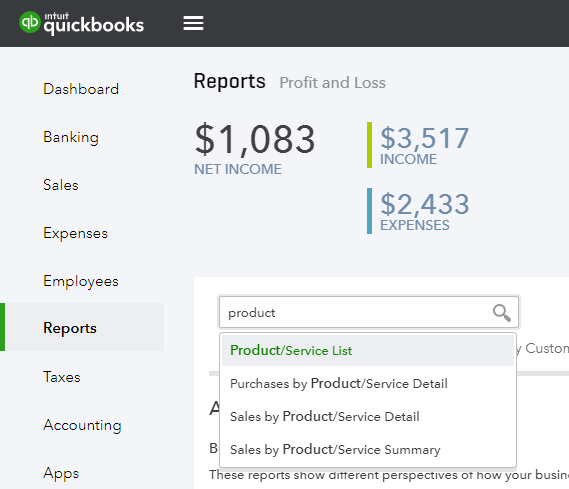
Type in the search Product/Service List and select that report
-
Select the page and arrow icon (highlighted in red below) and select Export to Excel

-
An excel file will begin downloading, you can send this file to your sales rep, or use the guide below to filter your inventory list
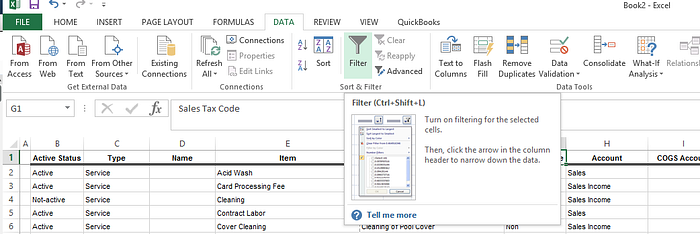
FILTERING ITEMS — Optional
-
Filter down the file to only the items you would like transferred into the Software. You can do this by using the Filters as displayed below:
-
Select the section with the column headings and corresponding data but DO NOT INCLUDE TITLES. Then choose Data > Filter
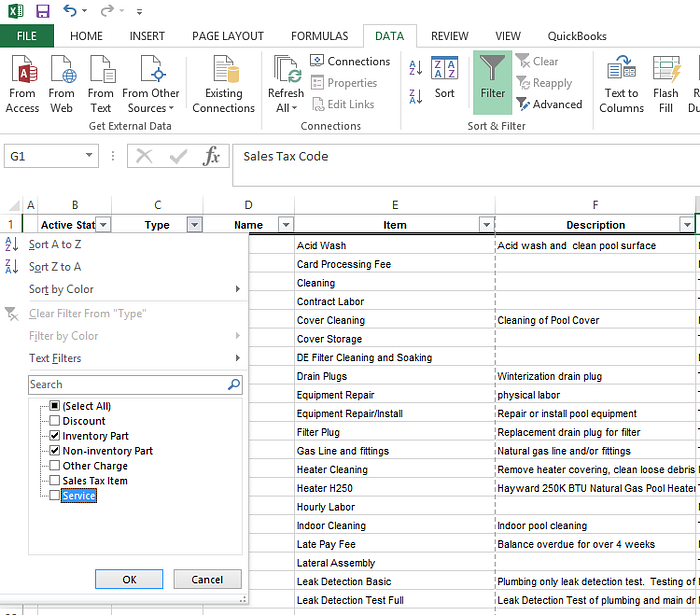
-
By Clicking the small arrow on the Column Headers, you can filter down your list. In this example we only want to import Inventory and Non-Inventory Items, not services, discounts etc.. Press OK when you have finished selecting your items to include.
-
You can delete any items you do not want transferred to the Software. You can always manually add and adjust items in the future. This import is to accelerate the initial process
-
Save the file and send it to files@PoolOfficeManager.com. Please include your company name in the file name.
Resources!
Check out our website: https://poolofficemanager.com/
Help number: 614-710-0074 ext 3