QuickBooks Desktop — Data ImportUpdated 2 years ago
Below are the guides for BOTH Customer and Inventory Data to ensure a successful transfer of information.
Customer Data
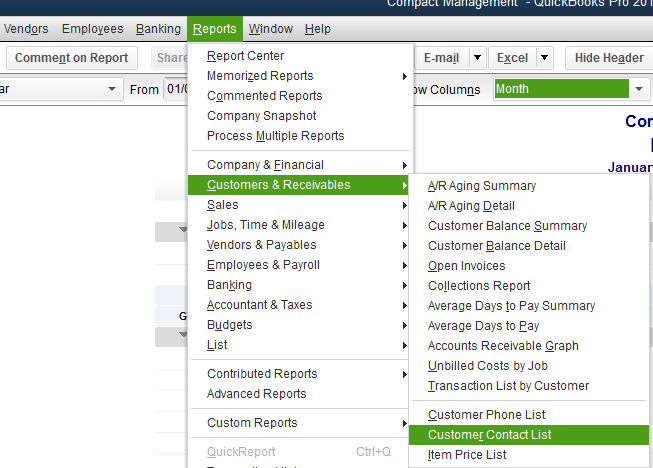
1. Access your customer contact list:
2. Navigate to the Customize Report Tab to modify the settings. We recommend including everything listed below:

Customer, Last Name/Company Name, First Name, Phone Number, Alt. Phone Number, Email, CC Email,
Shipping Street, Shipping City, Shipping State, Shipping ZIP, Note,
Billing Last Name/Company, Billing First Name, Billing Email, Billing CC Email, Billing Street, Billing City, Billing State, Billing ZIP, Tax Item, Sales Tax Code
Sales Tax Item, Is Customer Commercial Account?
3. Export the Report to Excel by clicking Excel > Create New Work Sheet > Export

4. Email the report to [email protected] to have the customer list imported
Inventory Data
-
Open QuickBooks and click List > Item List

- On the bottom of the screen select Excel > Export All Items…

3. Another screen will appear, select Create New Worksheet then Export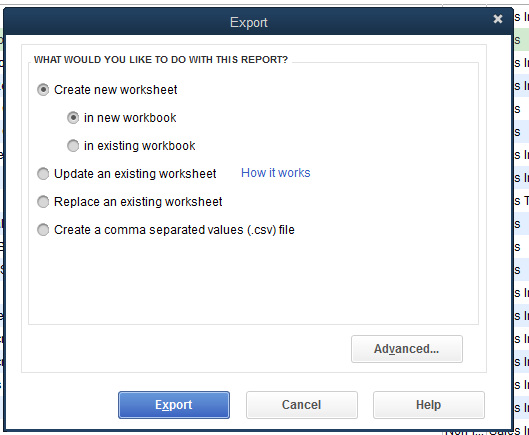
FILTERING ITEMS — Optional
-
Filter down the file to only the items you would like transferred into the Software. You can do this by using the Filters as displayed below:
-
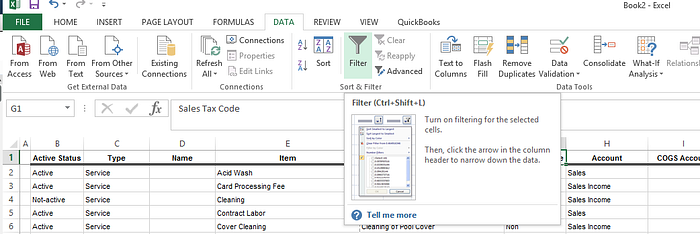
Select Data > Filter
-
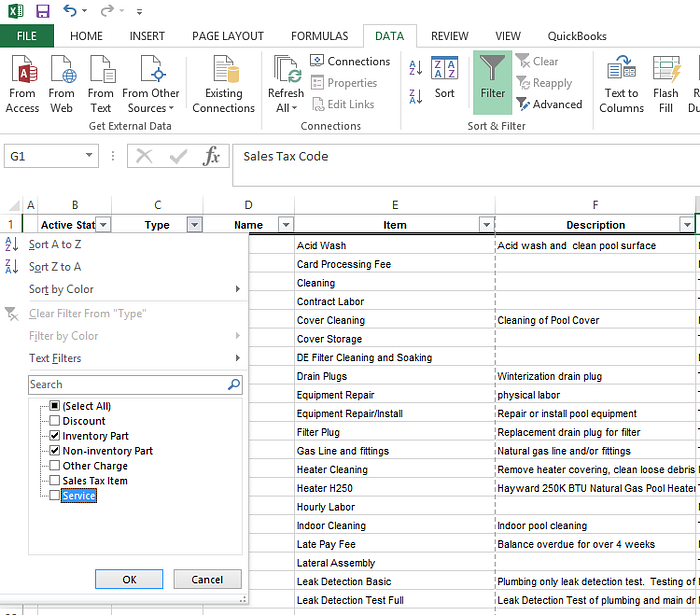
By Clicking the small arrow on the Column Headers, you can filter down your list. In this example we only want to import Inventory and Non-Inventory Items, not services, discounts etc.. Press OK when you have finished selecting your items to include.
-
You can delete any items you do not want transferred to the Software. You can always manually add and adjust items in the future. This import is to accelerate the initial process
-
Save the file and send it to [email protected]. Please include your company name in the file name.
Resources!
Check out our website: https://poolofficemanager.com/
Help number: 614-710-0074 ext 3