Inventory Management - BarcodeUpdated 2 years ago
Use barcodes to streamline the invoicing process! In little time and for as little as $100, you can take full control of your inventory and ordering process. Scroll below for instructions on how to set up your Barcode system the first time.
Using the Barcode System in POM
1. Open the Inventory in POM and select the Barcode button at the top of the page.
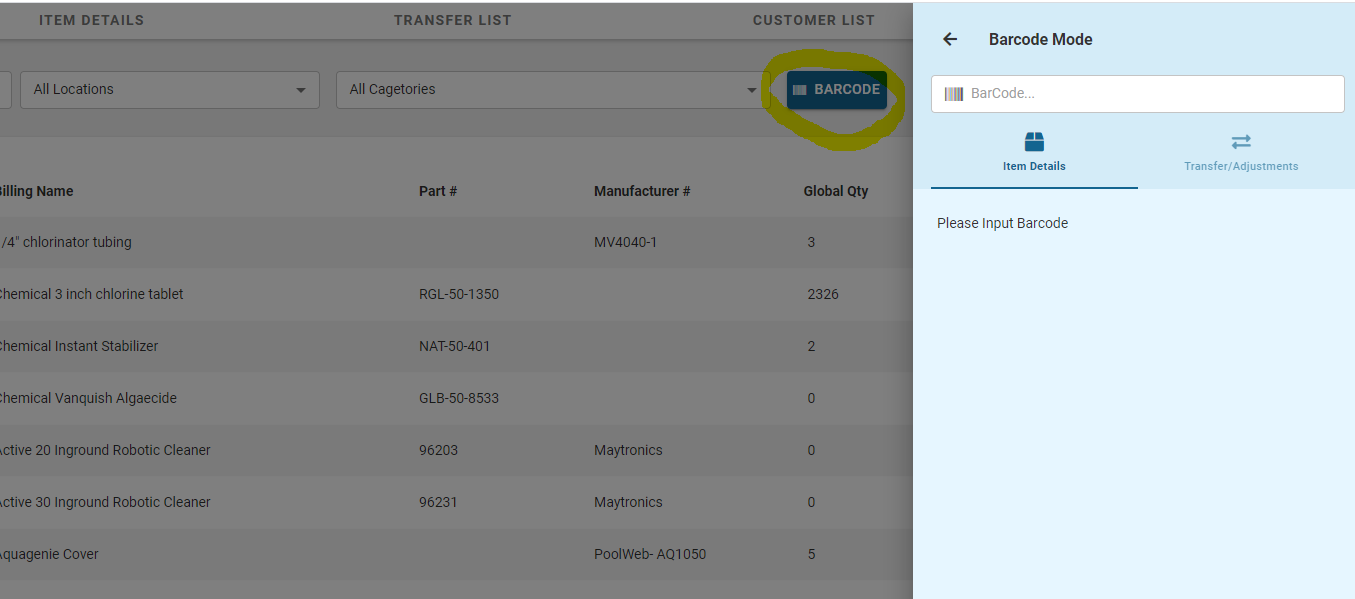
Item Details - allows you to lookup items and then take additional action such as placing an order or receiving.
Transfers and Adjustments are to Quickly adjust inventory.
Select the Source location, and Destination
Select the Quantity to transfer each scan
Begin scanning items to initiate the transfer
Example:
You purchase 50lb bags of Bicarb and have in your system by the single pound. You received 10 Bags on delivery.
Set the Location as Supplier - Destination as Warehouse and Quantity to 50. (50 lbs in each bag)
You can scan each bag or the same one 10 times, and your inventory will be updated.
Alternate - You can set the quantity to 500 and scan once.
Initial Barcode Setup - If you do not use a barcode system today
Items Needed:
Barcode Scanner for warehouse/computer ($20-$100) - POM can work with Bluetooth barcode readers too! Plug the scanner into the computer, or connect with Bluetooth and begin in seconds. We purchased the ones below as a reference point.
Wireless Barcode Scanner (no bluetooth)
Barcode Label Printer (Optional $50-$100) - Use for creating and printing labels to apply on shelving or binders. Make sure you can generate barcodes and import files for lists of items and their barcodes.
How To
1. Export all items from Inventory in POM: Inventory > Actions > Export Inventory
2. Open the spreadsheet, with your barcode scanner connected, and select the cell under Barcode and scan any existing barcodes already on products. Utilize existing barcodes to optimize the process
You can also do this directly in POM, open each item and click the barcode field to scan the barcode directly.
3. For Items that do not have barcodes, create your own string of characters and numbers. Recommended to use the actual part number of the product for ease of use, or a simple 6 digit number can work well.
Example:
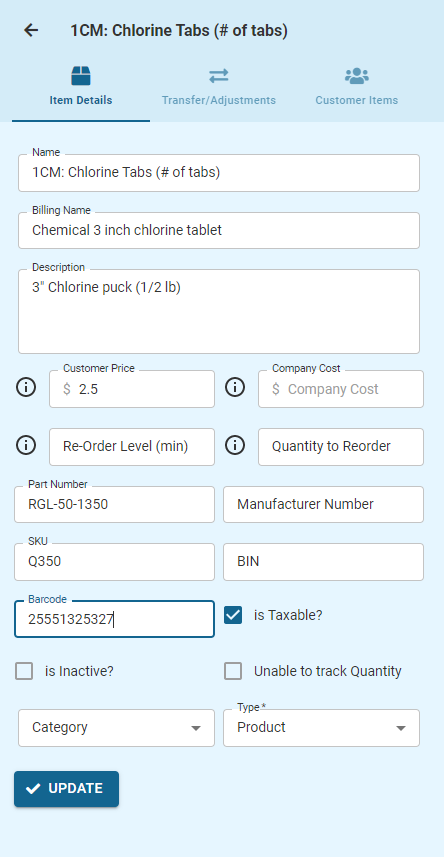
The Barcode on Salt was unavailable, so as illustrated in yellow, we've copied the Part Number from PoolCorp to use as the Barcode. An alternate is to create your own for example 800501. All items listed below are the actual barcodes scanned from the product.

4. If using a spreadsheet, save and import the spreadsheet directly back into POM Inventory > Actions > Import Inventory and upload the saved file
5. Print any additional barcodes necessary. Place on shelving, or in binders to quickly scan or lookup items.
This is often simple, you can take the same spreadsheet, or export it from POM. Delete all columns not needed for a barcode label, we recommend printing: Item Name, Barcode and Part Number(space permitting)
You know have a full inventory management system based on barcodes! Continue to learn how to use:
Item in the field:
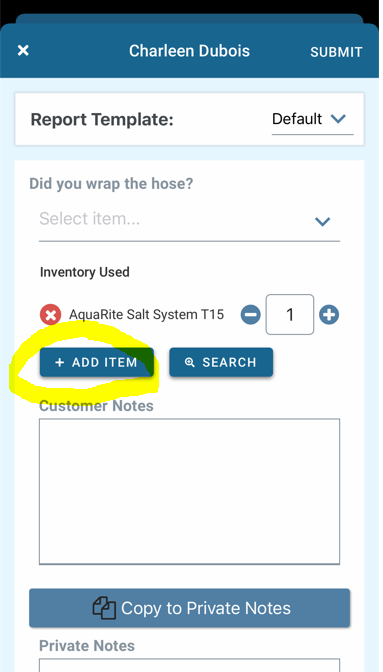
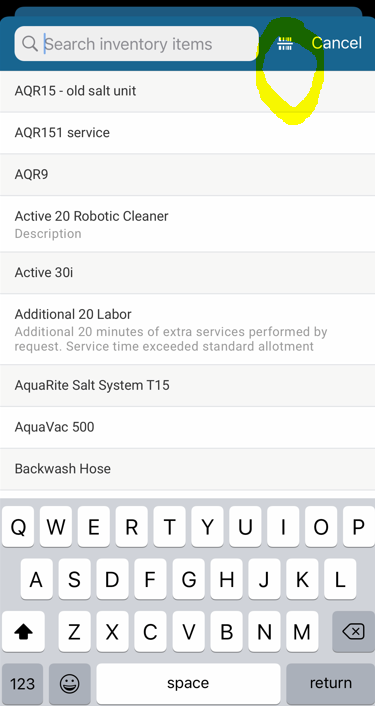
When in the field using the mobile app, simply select to add an item while creating a report, choose the barcode icon and then you can scan barcodes using the device's camera.